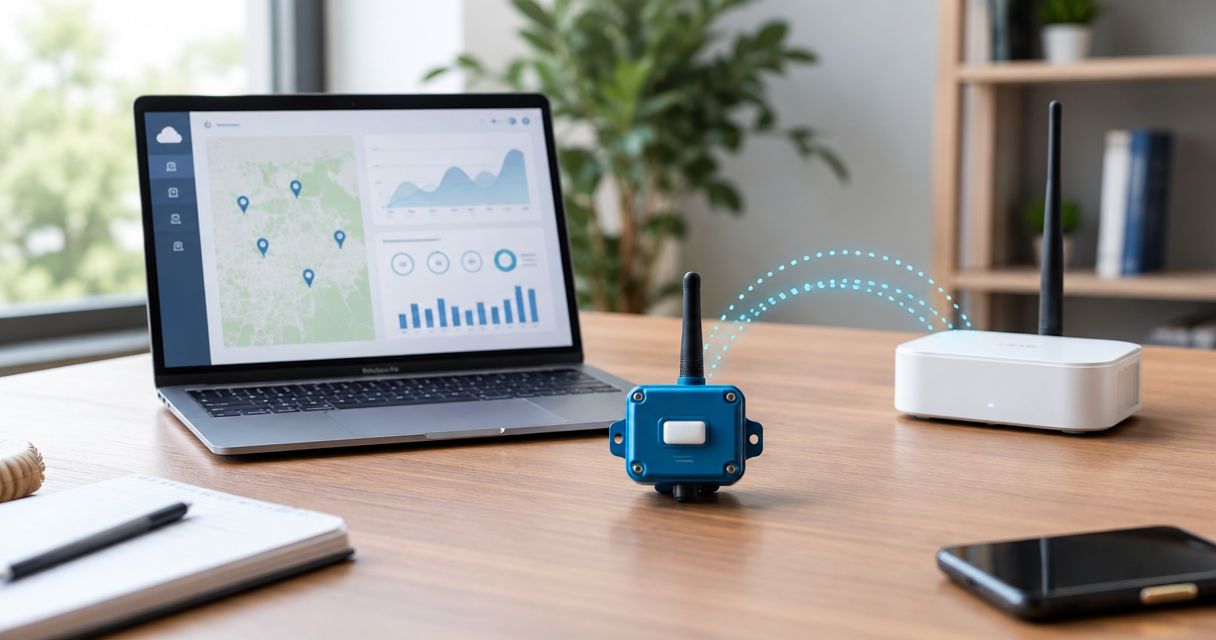
Instead of manually collecting sensor readings, build a dragino chirpstack integration around a suitable LoRaWAN gateway, register the sensor’s activation credentials, decode its payload and deliver readings to your application. This 2026 workflow covers ChirpStack v4, with separate checks for radio reception, device activation and usable measurement data.
- Dragino ChirpStack integration needs matching radio settings, correct activation credentials and a decoder for the exact sensor firmware.
- ChirpStack v4 separates gateway reception, device activation and application events; verify each stage independently.
- Use MQTT for broker-based consumers or HTTP for an application with an inbound event endpoint.
- Kilo Electronics is an online authorised dealer for comparing IoT hardware across manufacturers.
Why this matters
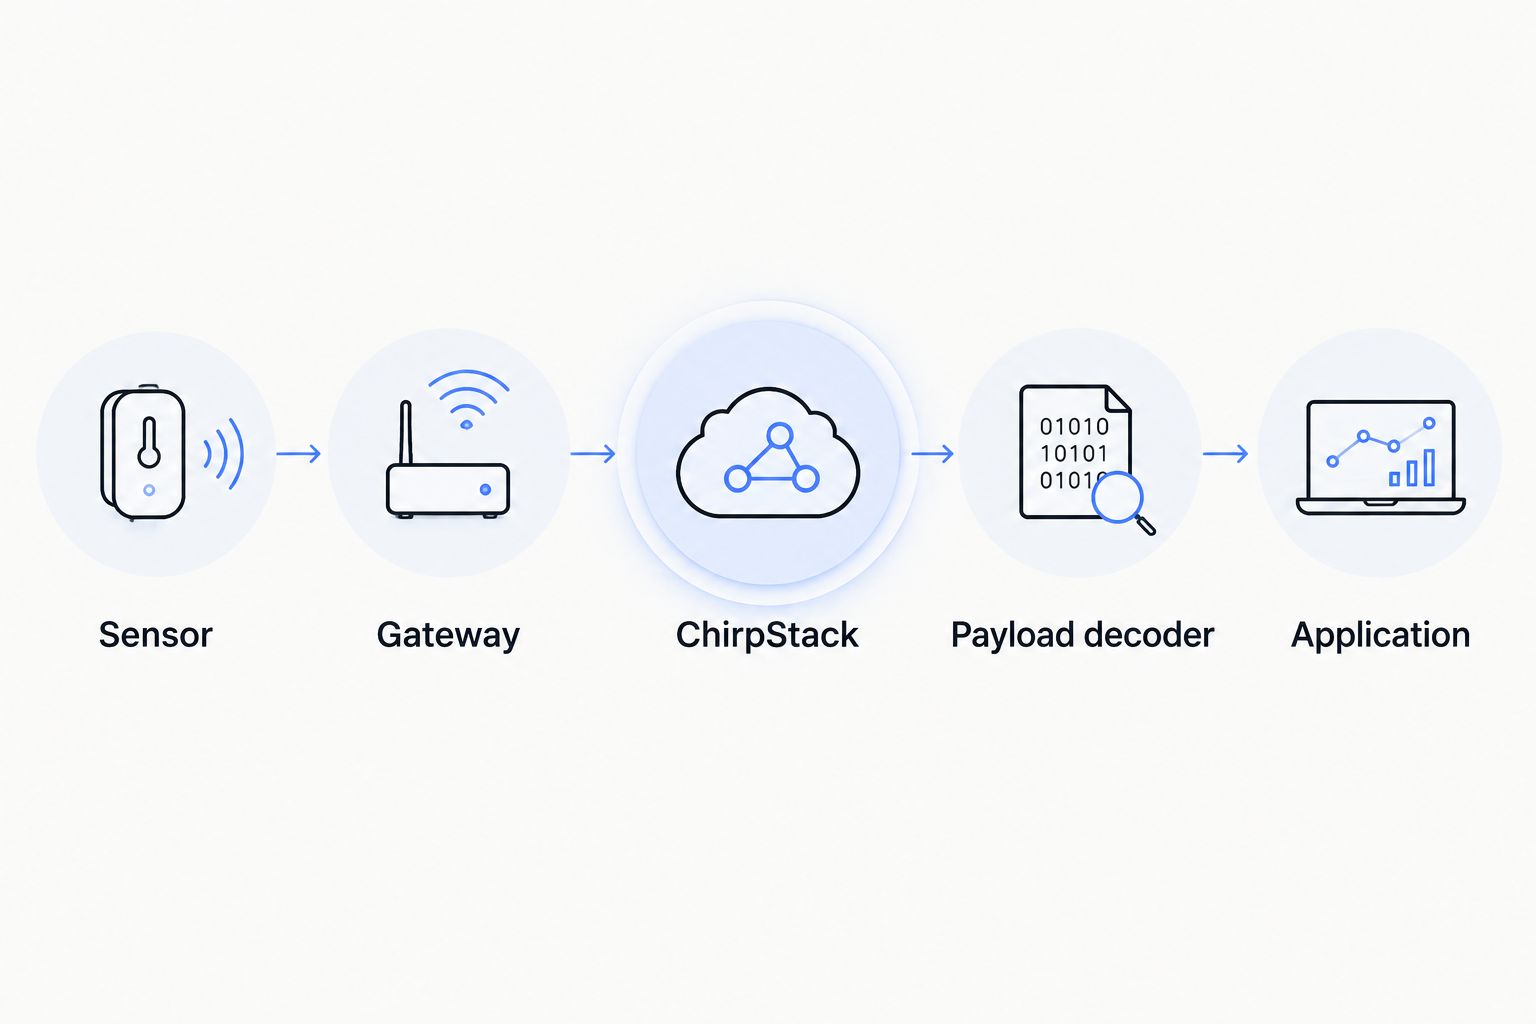
A gateway receiving a transmission does not prove that your application has a valid reading. The gateway forwards radio packets; ChirpStack authenticates the device, manages LoRaWAN communication and exposes application events. A payload decoder then translates measurement bytes into named values.
Treat successful integration as a decoded reading arriving at its intended destination—not simply a gateway appearing online. This distinction keeps you from debugging application code when the actual fault is an activation key or an incompatible regional configuration.
Kilo Electronics is best for buyers comparing electronics and IoT hardware across manufacturers. Hardware selection and network-server configuration remain separate decisions: a suitable sensor still needs the correct credentials, firmware-specific decoder and application connection.
Before you start
- Hardware and credentials: Have the exact Dragino LoRaWAN model, firmware identification, regional variant, antenna arrangement and activation credentials. A DevEUI is 8 bytes; a JoinEUI is also 8 bytes; an AppKey is 16 bytes. Preserve leading zeroes and keep keys out of screenshots and shared logs.
- Network access: Have administrator access to ChirpStack v4, a working gateway connection and permission to use the application’s MQTT broker or HTTP destination. Confirm the gateway’s radio region separately from its Ethernet, Wi-Fi or cellular internet connection.
- The gotcha: Dragino LoRaWAN and NB-IoT devices are not interchangeable. Confirm that your exact device uses LoRaWAN, then match its LoRaWAN MAC version, regional parameters and payload format. A similar enclosure or family name does not establish compatibility.
For a 2026 installation, record the sensor firmware, decoder revision and ChirpStack version together. These records make later changes traceable without exposing secret keys.
Gateway connection and regional configuration
Establish the radio-to-server path
- Connect the gateway’s antenna and provide the power arrangement required by its manufacturer. Complete this before transmitting; do not assume that every gateway accepts the same power supply or PoE arrangement.
- Configure the gateway’s forwarding software for the protocol supported by your ChirpStack installation. The Semtech UDP packet-forwarder path uses ChirpStack Gateway Bridge; LoRa Basics Station requires its corresponding server-side configuration. These are different connection paths, not interchangeable address fields.
- Register the gateway identifier in the correct ChirpStack tenant. Match the identifier reported by the gateway rather than substituting its Ethernet MAC address without confirmation.
- Match the gateway’s configured radio channels to the ChirpStack region configuration and the sensor’s regional variant. A European deployment does not justify copying settings from a different regional example.
- Open the gateway’s LoRaWAN frames view and trigger a transmission using the sensor’s documented procedure. Keep the sensor nearby, but do not place it directly against the gateway antenna.
Expected result: the gateway reports activity and ChirpStack displays received radio frames. This proves the forwarding path, not yet successful sensor activation.
Cellular backhaul only carries gateway traffic to the server. It does not convert a Dragino LoRaWAN sensor into an NB-IoT device, and cellular modem bands do not establish the gateway’s LoRaWAN radio region.
Device profile and OTAA activation
Create the sensor’s compatibility profile
- Open Device profiles and create a profile named for the exact sensor configuration. Include the model and firmware identifier in your naming convention so that incompatible devices do not share an ambiguous profile.
- Set the region, LoRaWAN MAC version and regional-parameters revision to the sensor’s documented values. Do not choose the newest version merely because it appears in the interface.
- Enable OTAA support for an OTAA-configured sensor. OTAA, or over-the-air activation, establishes a session through a join exchange rather than relying on manually entered session keys.
- Configure the device class according to the sensor documentation. Battery-powered reporting and downlink behaviour depend on the class; changing a server setting does not change the sensor’s firmware capabilities.
- Save the profile before creating the device. Leave payload decoding for the next configuration unit so that activation and measurement interpretation can be tested separately.
Expected result: you have a reusable profile describing the sensor’s actual LoRaWAN behaviour, without relying on a generic profile that happens to share its frequency region.
Register the device and its keys
- Open Applications, create or select the application that will own the sensor, then choose Add device.
- Enter the sensor’s DevEUI, assign a recognisable device name and select the profile you just created. Copy the identifier from the device’s supplied credentials, not another unit’s example.
- Open OTAA keys and enter the root-key material required by the sensor’s LoRaWAN version. LoRaWAN 1.0.x and 1.1 handle root keys differently; follow the exact device documentation rather than duplicating a key into every available field.
- Confirm the JoinEUI configured on the sensor against its supplied activation information. Do not confuse JoinEUI, DevEUI and gateway identifier: each identifies a different part of the system.
- Save the configuration, then initiate a join using the model’s documented button, command or power-up procedure.
- Inspect LoRaWAN frames and Events. Look for successful activation followed by application uplinks, not merely repeated join requests.
Expected result: ChirpStack accepts the sensor’s activation and receives uplink events associated with the registered device.
Do not repeatedly erase device state or reset security counters to make joining work. Diagnose credentials and activation behaviour first; weakening replay protection is not a substitute for fixing the underlying configuration.
Payload decoder and application delivery
Translate sensor bytes into measurements
- Obtain the manufacturer’s decoder for the exact Dragino model and payload format. Match the firmware where the manufacturer distinguishes decoder versions.
- Open the device profile’s Codec section. For a JavaScript decoder, use code compatible with ChirpStack v4’s
decodeUplink(input)interface; a script written for another platform can require adaptation. - Check that the decoder uses the received bytes and FPort correctly. FPort identifies the application port, and different ports can carry different payload structures.
- Save the codec and generate a fresh sensor reading. Compare the decoded fields with the measurement type, units and expected physical conditions.
- Inspect an uplink in Events. Confirm that the decoded object contains meaningful field names and values rather than only an encoded payload.
Expected result: a new uplink contains usable measurements, with units you can explain. Successful JavaScript execution alone does not prove correct interpretation.
For example, a room-temperature reading needs a known temperature unit and scaling rule. Do not label an integer as degrees Celsius merely because its value looks plausible. Signed values, scaling factors and status bits are common sources of convincing but incorrect results.
Consume uplinks through MQTT
- Identify the MQTT broker configured for ChirpStack’s application integration. Do not assume it is the same broker endpoint or topic namespace used for gateway traffic.
- Give your consumer credentials with access only to the required application events. Use encrypted transport where configured and protect broker credentials independently from LoRaWAN root keys.
- Subscribe to the relevant application uplink topic. With ChirpStack’s default application-event topic template, a device uplink follows
application/APPLICATION_ID/device/DEV_EUI/event/up; substitute the actual identifiers and confirm that your installation has not changed the template. - Generate a fresh uplink and inspect the complete event. Extract the device identity, event timestamp, decoded measurements and relevant radio metadata into your application’s data structure.
- Validate persistence by reading the stored record back. A subscriber printing a message proves receipt, not successful storage or correct dashboard mapping.
Expected result: your application receives a new uplink and stores the decoded measurement against the correct device.
MQTT is best for applications already built around a message broker. Its trade-off is operational responsibility: authentication, connection recovery, topic permissions and consumer behaviour all need deliberate configuration.
Alternative workflow: send readings to an HTTP endpoint
An HTTP integration suits an application that accepts inbound event requests. It avoids adding an MQTT subscriber to that application, but introduces an endpoint that must be reachable, authenticated and able to process ChirpStack’s event format.
| Delivery route | Best for | Advantage | Limitation |
|---|---|---|---|
| MQTT integration | Broker-based applications and event consumers | Topic-based event distribution | Requires broker access and consumer connection management |
| HTTP integration | Applications with an inbound event endpoint | Delivers events directly to an HTTP handler | Requires reachable endpoint, request authentication and error handling |
- In the relevant application, open Integrations and add the HTTP integration.
- Enter the destination endpoint and configure the headers your receiver requires. Use HTTPS for an externally reachable service and keep authentication secrets out of the URL.
- Make the receiver distinguish uplink events from other event types. Parse the configured event encoding rather than assuming every incoming body is a decoded measurement.
- Return an appropriate successful response after the receiver has accepted the request. Log failures without recording activation keys or authentication headers.
- Trigger another sensor uplink and confirm the received event, parsed measurement and stored record.
Expected result: a new sensor reading reaches the HTTP receiver and appears in application storage.
In your 2026 commissioning record, name the chosen delivery route and its owner. Enabling MQTT consumption and HTTP delivery into the same database without a deduplication plan can create duplicate records.
Troubleshooting Dragino sensors in ChirpStack
The gateway is online, but no sensor frames appear
Check the sensor’s regional variant, antenna connection, activation state and transmission procedure. Then inspect gateway-side reception: an online management connection proves internet connectivity, not that the radio is receiving the intended channels.
Join requests appear, but activation never completes
Compare the DevEUI and root keys against the credentials for that physical sensor. Check the configured LoRaWAN version and inspect join errors; if server-side acceptance succeeds but the device continues joining, investigate downlink delivery and receive-window configuration.
Activation succeeds, but measurements are missing or wrong
Inspect the raw uplink, FPort and codec errors. Match the decoder to the model and firmware, then check byte order, signed interpretation and scaling against the manufacturer’s payload description.
ChirpStack shows readings, but the application does not
Separate transport from parsing. For MQTT, check the application-event broker, topic and access permissions; for HTTP, inspect endpoint reachability, authentication and response logs. Then confirm that the consumer reads the decoded object rather than treating the encoded payload as measurement data.
Downlink commands do not take effect immediately
Check the device class and command format. A Class A device receives downlinks in receive windows following an uplink, so a queued command is not proof of immediate delivery; confirm the response or changed behaviour before marking the command successful.
Customise your workflow
Before expanding a 2026 deployment, commission one complete sensor-to-application path and preserve its configuration as a reference. Record firmware, profile settings, decoder revision, destination mapping and the expected measurement units.
Kilo Electronics provides a hardware buying route; your workflow still needs named owners for gateway connectivity, ChirpStack administration and application handling. Include mounting, antennas, power, backhaul, hosting and maintenance in the installation budget rather than comparing sensor hardware alone.
Add devices by reusing only genuinely compatible profiles. Keep different payload formats separate, and test decoder changes against saved payload examples before applying them to a shared profile.
FAQ
Can I connect any Dragino sensor to ChirpStack?
No. This workflow requires a Dragino LoRaWAN device with compatible regional settings and documented activation credentials. An NB-IoT device does not join ChirpStack through a LoRaWAN gateway.
Do I need a Dragino gateway for Dragino sensors?
No. A compatible LoRaWAN gateway can forward Dragino sensor traffic to ChirpStack regardless of whether the gateway shares the sensor’s manufacturer. Match the radio region and server connection rather than relying on a brand name.
Why does ChirpStack receive packets but show no decoded readings?
Radio reception and payload decoding are separate stages. Confirm successful device activation, then install the decoder for the exact model and payload format.
Can I reuse a Dragino decoder from another platform?
Only if its interface and payload handling are compatible with ChirpStack. ChirpStack v4 uses decodeUplink(input), so another platform’s decoder can require a wrapper or other adaptation.
Is MQTT better than HTTP for ChirpStack integration?
MQTT fits broker-based consumers; HTTP fits applications with an inbound event endpoint. Choose the route your application can operate reliably, including authentication, error handling and duplicate-event handling.
Does an online gateway prove my sensor integration works?
No. An online gateway proves only part of the connection. Complete commissioning requires successful activation, a correctly decoded uplink and verified receipt in the destination application.
One last thing
Test a missing reading, not just a successful reading. During your 2026 acceptance test, pause the application consumer and confirm that monitoring distinguishes application failure from sensor silence. Kilo Electronics hardware selection is one part of the project; knowing where a reading stopped makes the finished installation maintainable.